I thought I would branch out here and do a little how-to on my zigzag quilt, in case you are a novice like me who needs some assistanc in figuring these out. Â I say novice and not beginner, because I do assume some quilting and sewing basics. If you are a total newbie, I highly recommend checking out books from the library like Elizabeth Hartman’s Practical Guide to Patchwork or Denyse Schmidt Quilts, both of which go over the basics of quilting.
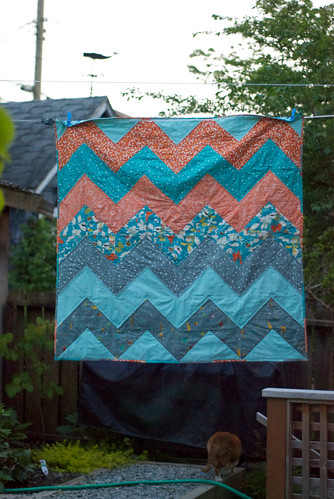
My finished quilt was approximately 50″ by 50″, so it was a generous baby-size quilt, or even lap quilt.
What you need:
8 half-yards of fabrics of your choice (a total of 4 yards) (a half-yard is 18″ x 45″)
Rotary Cutter/Mat and Ruler
Note that you will also need batting and additional fabric for the back; there are many good tutorials out there on how to make a quilt sandwich, attach binding and actually quilt it all together, so this is just a tutorial (oooh fancy-schmancy word!) for how to make the quilt top, and I refer you to the books above for other steps.
I will also suggest that you read through all the instructions below so you know what the purpose of each step is. If anything is unclear, please let me know and I’ll try to revise this. I haven’t ever tried to write a tutorial before and I’m learning it’s not as easy as it seems.
1. First! Fold your half-yard in half, selvedge to selvedge, and cut it into two strips 8″ wide. Then cut those strips horizontally into 8″ squares. Repeat with the remaining half-yards: you need 8 8″ squares in each of your fabrics.
Note, that you will have quite a bit of fabric left over. I turned my extra into bias binding and used it to bind my quilt
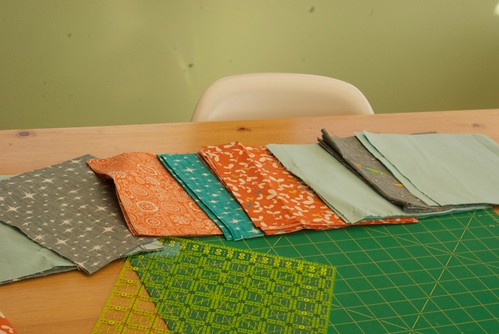
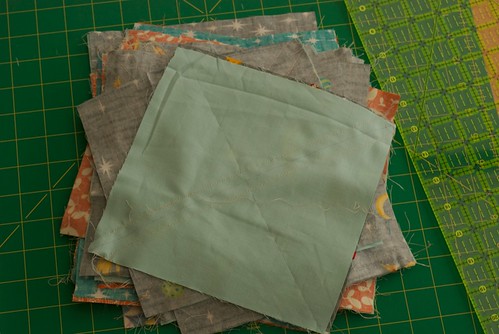
When you are done you will have 64 squares of fabric, as below.
2. Lay the squares out in the order you want them to be in the quilt; for example, my top row is baby blue, then the grey rocket ships etc.
3. Now this part is a bit hard to explain, but if your first row is baby blue, take FOUR of those eight baby-blue squares, and FOUR of your second row (orange in my case) and pair them up, so you have four piles of two. Set the other squares from each row aside for now.
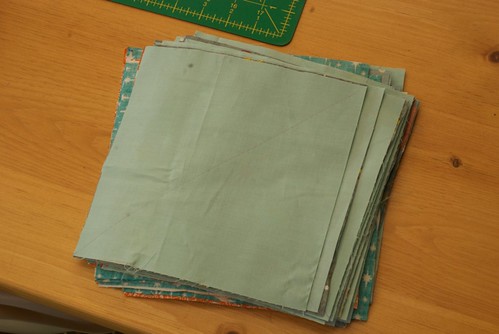
4. Using a washable fabric marker or fabric pencil, draw a diagonal line down the middle of top square in each of your pairs, like in the picture below.Â
In my case, I drew a line down the eight baby blue squares, but not the gray squares. (P.S. If you haven’t tested to see if your fabric marker is washable, DO! Recently, I spent a good deal of time making something and the pencil did not wash out – serious bummer.)
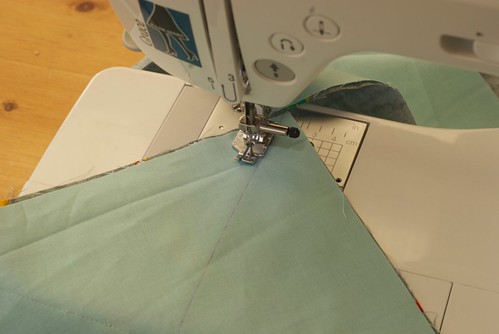
5. Now, you’ve got your line.  Sew the two squares together using by sewing a seam one quarter-inch away from the line.  Then do another line of stitching a quarter-inch from the other side of the line.
Here’s a picture of me sewing a seam down one side using my quarter-inch foot. A quarter-inch foot is a good investment to make sure you get even quarter-inch seams. If you don’t have a quarter-inch foot, you can use the lines on your sewing machine plate to ensure the lines are only a quarter-inch. Whatever you do, make sure ALL the seams are the same width… so if you use a 3/8 width because that’s easiest for you given your sewing machine/feet, make sure ALL seams are 3/8.
I found it easiest to chain-stitch them, so I sewed all the squares down one side, not cutting the thread between them. Then I fed them through the other way and sewed all the squares on the other side.
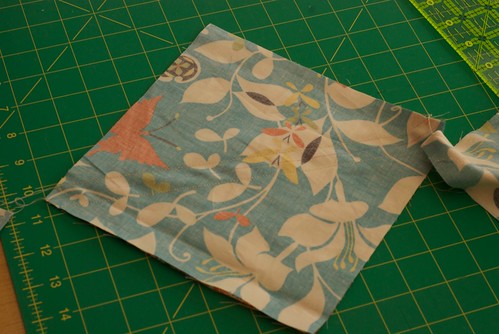
In the end, the square should look like this (Ignore the fact that it’s not the baby blue fabric; I guess I was working on a different row when I took this shot.):
In this shot, you can see the chain stitching (and a crooked seam, which I likely had to redo):
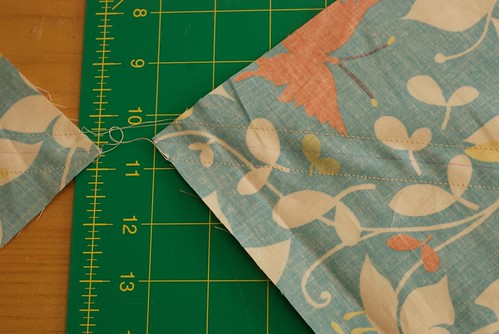
6. Repeat steps 3-5 for the rest of the rows. In my case, I first sewed FOUR blue solid and FOUR orange leaves. Next I would sew four (can I stop capitalizing now?) orange leaves and four grey stars; next I’d do four grey stars and four orange flowers etc. etc. etc.
I know what you’re wondering. You’re thinking, but I cut eight from each fabric, and I only used four from my first row? At the very end you will use the left over four from your first row and combine them with four from your second-to-last row.
7. Snip the chain-stitching between each pair of squares. Now you have 32 pairs of squares… hey, that rhymes.
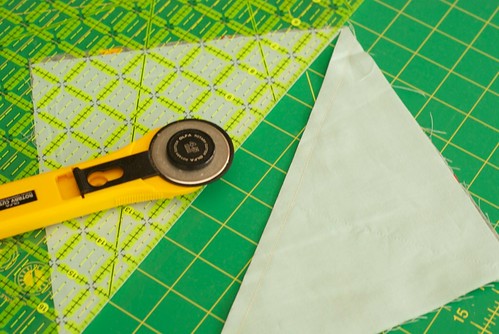
8. Now you are ready to cut. Remember that line you drew earlier, which is now between your two rows of stitching? Using your ruler and your rotary cutter, cut each pair of squares along that line, like so:
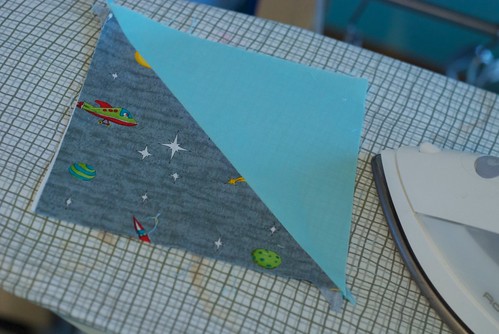
9. When you unfold each side of the pair you just cut, you will now have two squares that look like the picture below. Press them open.
10. Repeat steps 7 – 9 with the rest of your square pairs. You now, once again, have 64 squares, but now they are bicoloured.
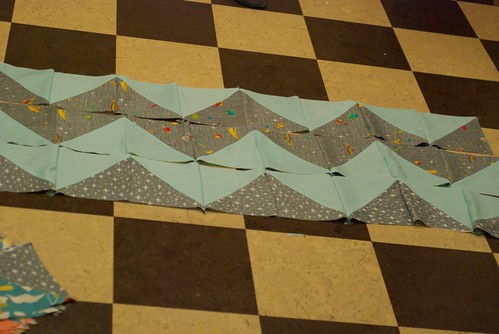
11. Lay out your squares in the zigzag pattern, and then sew the first eight of them into one long row (always right sides together!) using a quarter-inch seam. In the picture below, I have sewn three sets of squares into rows. Stop and look after each one you do, as it’s easy to become mixed up and get the alignment wrong, in which case your quilt will not be a zigzag and you will need to get the old seam-ripper out.
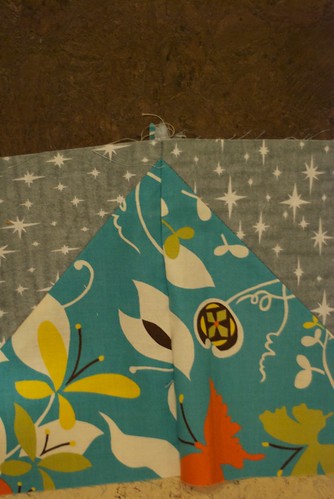
12. Don’t worry that your points look like this, as the extra fabric at the end of each point will disappear when you sew the rows together.
13. Sew each of the rows of 8 squares to the next row.
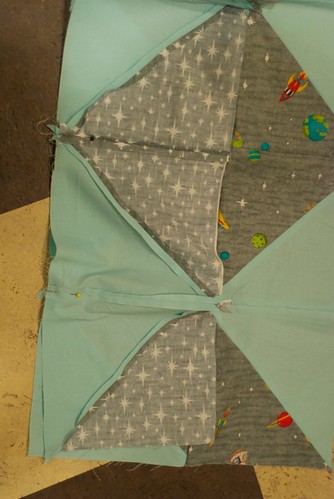
At this stage, it really helps to pin the rows together at each corner to make sure all the squares come together exactly at the seams, or at least as close as you can get. It may be that some of your squares are not exactly the same size, either because your seams weren’t all exactly the same, or your cutting was off by a bit. While it’s important to be as exact as you can, you can “cheat” a bit and play with the fabric stretching it slightly to get those points to match. In the end, don’t obsess over it because the recipient of your beautiful quilt certainly won’t.
Here’s a picture of the rows pinned together:
14. And that’s it! But I feel like it’s unlucky to have 13 steps, so I’m making it 14.  Once you’ve sewn the rows together, the quilt-top is done. As I mentioned above, I suggest Elizabeth Hartman’s site, or her book for tutorials on the next steps – making the quilt sandwich, quilting it, and binding it.
I myself just quilted them in some basic zigzags, but obviously the options are endless.
Happy quilting. If you do end up making a quilt from this pattern, I would absolutely love to hear about it below.
You’re amazing, hon! If I ever have the courage to take on (over!) quilting, I’ll be sure to read this!! xox