The “Urban Hoody”

So this is a little dorky, but I’m kind of into dressing the kids in matching, (or rather coordinating outfits!).  Both the kids have gone through growth spurts recently, so they were in need of some hoodies.  I used Heidi and Finn’s Urban Hoody pattern.  This was my first time trying a PDF pattern bought online and I’m sold.  The instructions were really clear and well-written with loads of pictures.  My only issue was the instant gratification – it took about five or six hours for the pattern to be e-mailed and I was so ready to start sewing right away.  I was assuming it would be e-mailed out automatically as soon as payment was received.

I did run into trouble because I lined the knit hoodies with non-stretchy qulting cotton – a beginner’s mistake.  But in the end we recovered from that and I think they turned out okay.  If I hadn’t done that, the buttons would have been  on the side, like in the photo on the website, instead of centered.  I find these days the problems I run into aren’t necessarily technique, but in not understanding the qualities of the fabrics I’m using.  But I’m learning.  Even since I’ve made these a couple of weeks ago, I’m feeling a bit more comfortable about my fabric choices.  I guess this is progress!

It’s not easy to find information on fabrics, because for me at least, I think I only really get it once I have a chance to touch it in the fabric store, and work with it.  I’ve since made a voile project, and also a silk and linen jacket which I hope to show you once I get around to adding the buttons.  But here are some posts that have been useful at helping me understand the options out there:

Oliver and S: Knit Fabric Basics
Adventures in Dressmaking: Good fabrics for beginners
The Dreamstress: Voile and Lawn: What’s the Difference?

I will definitely make this hoody again, but I think next time I won’t bother lining the whole thing – just the hood.  Also, I’d size up.  I made the size four for three and 1/2 year old P, but I think a size five might have been better, although he’s a slim kid and not unusually tall.  I don’t think this is entirely attributable to my use of non-stretchy lining either, although that’s certainly part of it.  I made the 18 month for 10 month old M and it was perfect.

Craft and Garden Apron

Looking at my last few craft posts, I realise it looks like I do all my sewing for Miss M… but I don’t!  Really.  I was so excited when Oliver + S: Little Things to Sew came out.  The book has 20 projects for children.  Oliver +S publishes lovely children’s patterns.  The book has lots of smaller projects, like bags, toys, smocks, hats – that sort of thing.  Some are simple – a little bear hat, and some are more complex, like a puppet theatre. Most are equally appropriate for boys or girls, although a few of them (the red riding hood, a doll’s dress, a tutu) probably appeal more to girls. Although I am sort of tempted to make P a tutu, since he loves to dance. Who wouldn’t want to twirl around in one?

The apron is the first project I tried from the book.  I think P will love wearing this when he makes pancakes with J on Saturdays, or even when he works in the garden with me.

As you can probably tell, the pattern itself was quite simple.  As recommended, I made homemade double-fold bias tape and it took for-evah!  Part of what I like about the book is that it really teaches you – there’s a whole section on making bias tape, and why you’d do it.  So even though you’re making simple things, I feel like I’m learning.  However, I do not have a bias tape maker so it took me an excessively long time.  I think next time I’ll use single fold bias tape, or just buy the cheap poly-cotton blended pre-folded stuff.  At least I learned another skill to file away for reference.

The fabric is from Ikea – a great source for home decorating fabrics, especially if you like their LARGE prints. The home dec fabric is heavier, and therefore better at keeping spills off him than simple cotton. This fabric actually has a slightly water-resistant feel – I think it might be for a tablecloth or something.  I have some other Home Dec fabric from there that is more like a light canvas.


I had quite a bit of this fabric, so I fussy cut the pieces to make the front with that big blue spiral.  I really love the way the back turned out with those two birds.

Baby Doll Shirt

Sewing can’t always be about the kids!  Sometimes it’s important to sew for yourself too!  And with spring right around the corner and my return to work impending (less than a month) I thought I’d freshen up my wardrobe with a few things made for me.

My lovely sister-in-law sent me Christine Haynes’ book Chic and Simple Sewing after seeing me lust after it in a quilt shop.  I decided to make this baby doll shirt first, and I’m very pleased with how it turned out. Pardon the goofy photo – next time I’ll model it against my back fence or something, but in the meantime, here it is.

The book is called “Chic and Simple” and the shirt was indeed simple to put together – it took me about an hour and a half.  It’s definitely a baggy baby doll, but I like the look.  It would also be cute tucked in to a high-waisted skirt or pants.

My sister-in-law warned me that some of the reviews on Amazon Canada were a bit negative.  But I’m pleased with it – there are several projects in it that I’d like to do, including a couple of tops, a dress, and a very basic skirt.  The author also includes some basic techniques, like learning working with bias tape and gathering. Another feature I really liked is that it tells you exactly which pattern pieces to cut out for each project. I have a few books like this, and in some of them you really have to hunt to find what you’re supposed to cut out, and halfway through you might realise you forgot a cuff or a facing.

The book is definitely one for very beginners – none of the projects are remotely tailored, and hence are all quite casual. There are no zippers or even buttonholes.  Still, I think this is a great book for someone just starting to make clothing. I know it’s given me some confidence. Although I haven’t shied away from making stuff for the kids, for some reason I’ve been intimidated to make things for myself. But since this top worked out so nicely, my next project for me is going to be a linen and silk jacket from another, slightly more advanced, level book I have.

(Fabric for the shirt is from Denyse Schmidt’s Hope Valley Collection in Piney Woods.)

Ice Cream Dress 2

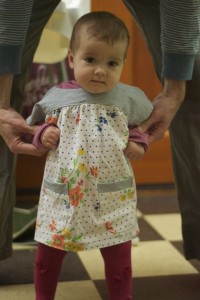
I made the Oliver and S ice-cream dress again – this time it was much faster. I didn’t do them the contrasting hem this time because I was thinking it would be more of a tunic come summer – also, I didn’t have enough of the stripey fabric. I made this out of a bedsheet I found at a thrift store – love the vintage-y flowers and dots! Of course, it required much washing and sterilising because I am paranoid like that. I let my kid eat dirt, yes, but a thrift store sheet? Hm.

I can’t believe I have just two more weeks of maternity leave. Part of me has been looking forward to the return, but I feel very sad knowing that this time with M is over. For ten months, we’ve been together all the time, excepting the odd few hours here and there. Her little two-tooth grin lights up my day. We know each other so well, and she’s such wonderful company. We’ll never know the details of each other’s lives so well again. And now that time is coming to an end, and I’m going to miss her so much.

More Quilt Blocks

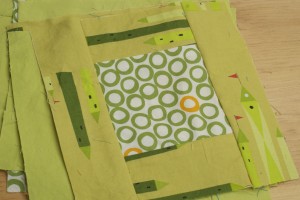
You’ve probably forgotten about this quilt for P and M by now, but I keep plugging away at it. I have now finished all the blocks and am sewing together the quilt top. At one stage I thought I’d mix all the blocks together, but after laying it out that way, it was just too much. So I went back to my original idea of a rainbow quilt – stripes of red, orange, yellow, green and blue. I keep fussing with it and ripping out seams, but I really think I’m going to love it when I’m done.

Baby Leggings

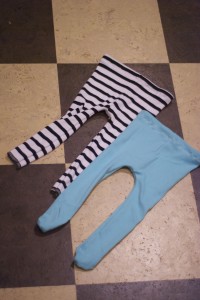
This week I made some leggings for Miss M. I used a stripey fabric I found at a local store, and some leftover jersey knit from the Ice Cream Dress.

I followed this baby tights tutorial, and it really was as easy as it looks. Only difference is that I cut off the feet of one pair to make leggings.

I’ve learned a few things about working with knits recently. First, they make special needles for stretchy fabrics! Who knew? And second, there is a special stitch for working with them – looks kind of like a zigzag, but a little slopier. I hadn’t clued in to what it was for.

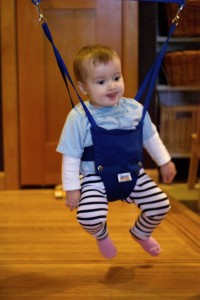
FYI: Leggings are good for jumping.

I’ve also been working on my quilt, so hopefully I’ll have some in progress photos of that soon too.

Pimp My Sewing Machine

“Pimp my sewing machine” doesn’t have quite the same ring to it as pimp my ride, does it? I decided to grab a few accessories today since my machine has been getting a lot of use. First I bought a walking foot – necessary for quilting. I tried previously to buy a cheap one on eBay but when it arrived, didn’t resemble the photo, and didn’t work well at all. Luckily the seller did refund me, but I didn’t want to make the same mistake again. So I went back to the dealer. The saleslady sold me a cheaper non-branded one made by the same manufacturer, so in the end it did not end up being much more than the the eBay one. I also got a gathering foot, since I have come to abhor gathering, which seems called for on almost every garment or doll garment I make, and it was only $6. I am pretty excited to use it!

Tag Along Dolls

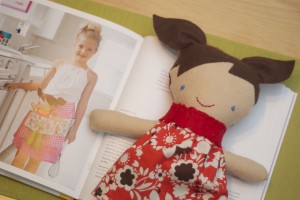
A couple of months ago I stumbled upon Hillary Lang’s Wee Wonderfuls at a discount bookstore nearby. Flipping through it there were so many cute little projects inside. I think it was actually this book that got me ambitious about sewing again.  If you’re at all interested in making dolls or stuffed animals, I do recommend it, as there are lots of cute projects, and, better yet, you learn a variety of techniques which you can then use to make your own creations.

I made one “Tag-Along” doll for my niece’s 5th birthday, and then made an extra one for M, because P appropriates all her other toys. Although of course, P appropriated this one too… hm.  It’s called the Tag-Along doll because there’s also a pattern for an apron to hold the doll, however I didn’t bother with that, so I guess it’s just a Hangin’ Out doll.

This is the third project from the book I’ve tried, and by far the most successful, probably because I am really learning not to rush my sewing. It’s always kind of a thrill when the finished product looks like the photo – at least I think it does, doesn’t it?

These little girls did take me a LONG time though, considering how simple they are. Stuffing and working on all the little details is just time-consuming. It’s fun when it’s a labour of love – I am hoping my niece appreciates this doll, if not now, then someday. But it’s also why I will never open an Etsy doll shop… to pay myself a living wage I estimate I’d have to sell these dolls for approximately $427 each. Still, it’s not always about the destination – it’s also about the journey!

Fabric is from Moda’s It’s a Hoot collection.

Car Mat/Play house

Remember how last week I talked about maybe doing some sewing for P, and pointed out this car house (which I discovered via Made By Rae)?

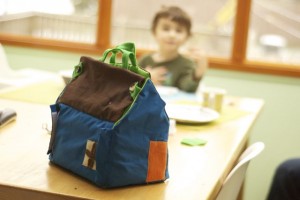
About five minutes after writing that post, I became obsessed. Or maybe I just made the mistake of mentioning it to P who then hounded me about it. For the next two days I was hard at work cutting out little felt pieces and making this adorable play house/play mat. P is a bit of a hoarder and loves to put all his toys in a bag or container and carry them around, so I knew this would be a hit. And as a carrying case it sure beats a garbage bag. We learned that the hard way when P was re-enacting the opening part of Toy Story 3 and put all his toys in a black garbage bag, which we then accidentally left at the park. The toys were recovered but not before a lot of angst (his) and tears (mine).

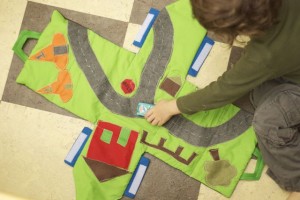
The house-bag serves a dual purpose as it then unfolds into this cute playmat. (Cars aficionados will recognise Cosy Cone #1 and #2 – placed there by special request. Yes, Pixar has taken over our life and I’m not even ashamed of it.)

I varied the pattern a little bit. I didn’t make it from felt – I made it from cotton with a piece of batting in between. So it’s definitely floppier than the original, but I like that look. I also didn’t add the extra pieces of fabric to make the mat square, as I had a feeling P would get frustrated trying to fold that all back together.

Can I just pause for a moment to say I am so proud of myself? It’s amazing how two months ago I struggled to make us Christmas stockings, and now just two months later I can pull this off! It was also my first attempt at machine applique-ing and though the results were a little uneven (I touched a few up by hand after this photo), by the end I was really getting the hang of it. That’s the great thing about sewing toys – your kid isn’t going to critique your stitches, and fit doesn’t matter so imperfections are not fatal to overall use. And P said “I LOVE it!” and insisted on taking it out with us, so I know it was a hit.

Small Plates Blocks

For your viewing pleasure, some blocks I am doing for the quilt I am making for P & M. It’s got kind of a rainbow theme, so I’m doing red, orange, yellow, green and blue blocks. I finished the red and the orange ones today so that’s what you see. I was planning to just have 10 different fabrics total, 1 print and 1 solid in each colour. However, as usual I didn’t read the instructions carefully so I got partway through and realised I didn’t have enough of my carefully selected fabrics. Luckily I’ve built up quite the fabric stash now and had enough other prints on hand. I actually think it’s going to work out better this way – the more the merrier – especially since I know see how L-A-R-G-E it will be. I really love those little cowboys.

Prints pictured are:
Castle Peeps by Lizzy House
L’il Cowpokes from Michael Miller
Teddy’s Garden from Benartex
Aldo to Zippy by Jenn Ski