Lunch

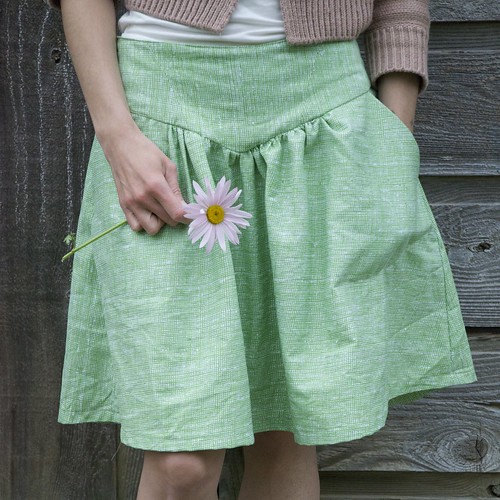
I wonder if future generations will look back on Pinterest and think we all had impeccably organised homes and ate lavish delicious meals with home churned butter. I have a confession – I love the sew, but there are many, many imperfections in what I do. Same with my knitting. And I’m quite okay with that. All that sewing/knitting time? It’s my selfish time. It’s my thinking time. I don’t do it because I feel this obligation to have the perfect product. It’s more like meditation.

The food Pinterests are the ones that really baffle me. Do people with families really have time to dip a hundred strawberries in yoghurt and freeze them for a snack? They don’t do what I do and plunk the unwashed carton in front of their children? If the kids want yoghurt, can’t they just eat it with a spoon?

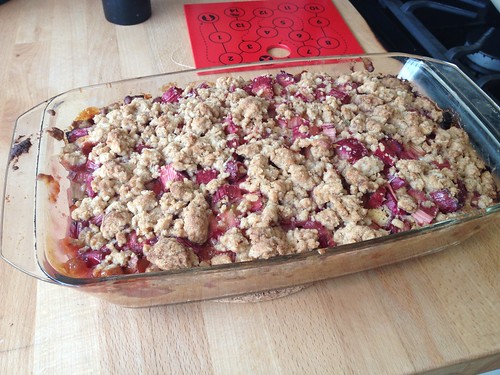
I do like to cook when I have time. But I never have time, so it’s mostly the same, simple, homely meals again and again. And yes, I mean homely, not homey. Lunch is even worse. Someone is always crying at lunch time, and the big kids are often at school or preschool. The word lunch is probably a misnomer since it’s often three by the time I eat. I am always hopeful that there will be some miracle and the babies will nap at the same time. And to be fair, they sometimes do but I always overestimate how much time I have, so I spend a few minutes on the ‘Net, pick up 47 pieces of Lego, and by then one of them is up again and I’m limited to food options that can be eaten with one hand, or prepared with a foot on the bouncy chair. I should make a list of what I’ve eaten for lunch in the past week. Monday: Mini-cupcakes – four to be exact. Tuesday: Almonds and Beef jerky. Wednesday: I think I forgot to eat lunch that day. Thursday: Kraft dinner my mother made me. Friday: Goat cheese and crackers which wouldn’t be so bad except I also inhaled half a box of Peak Freans. At least the almonds and beef jerky is kind of Paleo, right?

Crescent Skirt

I didn’t have to work this weekend, which was absolutely lovely. The past few months have been insane, and I spent much of last week sick, and then the weekend at the office. Our big deliverable was due Thursday, which meant I was actually FREE! Since I work four days a week that meant three lovely, long days of non-work related activities.

For those of you who don’t consider domestic activities to be relaxing, this may sound insane, but in my non-working bliss, I made homemade ice cream, cookies and a cake as well as homemade soup. I also knitted the cuff of a sock for my sock-making class, finished my Crescent Skirt, started and finished (other than buttons) a Lisette Traveler Dress and weeded the garden. My productivity was vastly aided by the fact that J was out on Friday night. Oh, and I went on a five hour bike ride with J. The kids are coming back from the park any minute with J to have soup. Perfection.

In the meantime, I will share you with the Crescent Skirt… I did as threatened and used the same fabric as I did for M’s Hopscotch Skirt.

Crescent Skirt

I think the Sewaholic patterns all use geographic names from around this area, so I was trying to figure out what “Crescent” refers too. I think it must be the beach out in White Rock. I actually don’t know the suburbs of my city very well, so I can’t really picture what the beach is like. I keep thinking of Crescent Street in Montreal, which has a much different reputation. It may have changed in the past few years, but it was a place with clubs and pubs and bars and lots of drunken tourists everywhere. But strangely, I think this skirt pattern could work for either location.

Untitled

The details:
Pattern: Sewaholic Crescent
Fabric: Lisette Twill from Joann’s
Difficulty: Hm… intermediate-ish? It’s not a difficult pattern, but cutting out the many, many pieces for the waistband, then interfacing them all, took a little bit of time, as did the yoke.
Cost: Hm, pattern was $17 or $18? Fabric, maybe $15 worth? I probably used about 2 yards. I also accidentally cut one piece two short, which meant I had to recut.
Time: Maybe 4-5 hours? The first night, I just traced, cut and interfaced, and then I sewed it in a few little spurts of activity.
Muslin made? No… I didn’t think I’d need to since it was really only the waist measurement that mattered. It does sit lower than I expected – above the hips rather than on my natural waist. I could have easily changed after making the waistband, but I decided to go with it. I think it would also look cute a size smaller and sitting up higher on the waist though.

Oh, and here’s the Rhubarb Cake I made:

Rhubarb Cake

Bonus is that, although P loved helping me harvest our ginormous rhubarb plant, he doesn’t seem to like rhubarb. So I get to eat all!!! Yum. The cookies on the other hand…

Something for Everyone Salad

This tofu salad is one of our “go-to” meals.  I know what you’re thinking: Tofu?  Ew.  Salad?  For dinner?  It won’t fill me up.  Tofu AND salad?  My toddler won’t touch it.  But I am going to try and dispel these myths!

The goat cheese makes it filling.  The nuts and cooked tofu are cooked in a way that makes them very palatable, even for a non-tofu lover.  Julian loves this salad – actually, he invented it.  This is a guy who once threw up when I put tofu in a smoothie for him. And even though I still can’t get P to eat “leaves”, he does dig out enough nuts, goat cheese and tofu to fill himself up. M likes tofu too – and what’s not to like really? It absorbs flavour from elsewhere and it’s a nice way to go protein into a baby who doesn’t yet eat much meat. Plus, despite the non-leaf eating, I’m convinced that repeated exposure will eventually lead to him eating some.

So you’ll need:

Mixed greens
Walnuts (or pecans, or any other nut you like)
a tiny bit of butter (a teaspoon maybe?)
1 tbsp Brown sugar
One package of extra firm tofu
1 tbsp Balsamic Vinegar
A small log of goat cheese (herbed if you like!)
Olive Oil

Cut the tofu into bite size pieces. Soak them in a small bowl with olive oil and vinegar – about a tablespoon of vinegar and 2 tablespoons of olive oil should be sufficient. Make sure all the pieces are coated and then stirfry them over the stove on medium heat until they’re a bit crispy – I find it takes about 10 minutes. At the same time, cook the nuts in a pan with a little bit of butter and brown sugar to caramelize them; use low heat and just a few minutes should be enough. Watch them carefully as nuts can burn easily.

Allow the ingredients to cool for a few minutes and then throw them into your salad. Crumble the goat cheese in as well and mix it up all up well. Presto, finito – serve.

Banana-Raspberry Pancakes

Pancakes are a weekly ritual around here. J is the pancake master, and over the years he has perfected his own recipe. Recently we started adding bananas, and they are amazing. With the banana and wholewheat flour, they’re also really filling, which isn’t the case for most carb-loaded breakfasts. I asked him for the recipe to share with you and was amazed to find out they have no sugar in them. Of course J and I douse them in (REAL! ALWAYS!) maple syrup, but P often eats them plain. They’re also one of the few things M will eat lots of, so I have frozen a bunch between sheets of wax paper so we can send them to daycare when she starts in 3 weeks… (AAAH!)

2 eggs
1 1/4 c milk
1/4 c yoghurt
1 1/4 c unbleached white flour
1/4 whole wheat flour
1 1/2 tsp baking powder
dash of salt
3/4 banana mushed up
handful of crushed frozen raspberries (optional)

Mix the wet ingredients in one bowl, then add in the dry ingredients. Grease your pan, ladle in your pancakes and flip away.

Kale Chips

So kale chips seem to be the recipe du jour these days and since I accidentally bought too much kale (random, I know), I thought I’d try them. Basically, you just throw them on some parchment paper with some olive oil and salt and heat them for about 15-25 minutes (less if your kale is dry, more if your kale is soggy, like mine was.)

They were… fine. I mean, they’re not packed with flavour but it’s a pretty painless way to eat greens. P was not convinced however. I believe his exact words were “Those are not chips. They’re green.” But M liked ’em.

Raspberry Chocolate Smoothie

This was going to be a photo of an amazing drink I recently discovered, but by the time I got around to taking a photo – it was gone.

So these days chocolate is practically health food, right? So why not have it for breakfast? I couldn’t believe adding cocoa to a smoothie hadn’t occurred to me before, but here’s how I made it.

1 c plain yoghurt (not French vanilla!)
1/2 c frozen or fresh raspberries
1 heaping tbsp of unsweetened cocoa
optional – add some coconut milk to water it down

Blend. (I used my Braun handheld). Sweeten if desired. The raspberries are probably sweet enough, but I threw in a bit of Agave nectar because, well, I have a huge container of it I’m trying to get through and I like the way it mixes into drinks. I know there is controversy about whether agave nectar is any better than refined sugar, but I like the consistency. A touch of maple syrup would work nicely too.

Just in Time for Oscar Night

Remembered at about 10:30 that I have to make a snack for a party I’m going to tonight… it’s a snowy day and I didn’t want to leave the house so I scoured the place for ingredients. Then inspiration struck – popcorn balls! I forgot how easy it is to make popcorn. I coated the bottom of a pan in vegetable oil, put down a layer of kernels and turned the stove to medium. The baby needed a change so I rushed off to get her dressed. When I came back to check on my popcorn, I opened the lid to find this:

Then I made the caramel. Needed:
1/2 cup unsalted butter
1 1/2 cups of loosely packed brown sugar
1 tsp salt (or none if you’re using salted butter)
a candy thermometer
(This will make enough for 12-16 cups of popped corn depending on how caramelly you want it)

Put the caramel ingredients on the boil and keep a close eye on the thermometer. Once it gets to 234F, aka the softball stage. Drizzle it over your corn and mix quickly.

Caramel bubbling on the stove

If you want to make popcorn balls, as I did, act quickly before the caramel cools. But it’s also really tasty just to eat it without balling it up. Mmmmmm.

Peanut Butter Bars

On a recent trip to the grocery store, I saw some steel cut oats, and thought “Hey, didn’t someone say those were healthier than regular oats?” So I bought some, but of course I never, ever remember to soak them the night before. And so poor P doesn’t get his oatmeal. The one time I did remember to soak them he said “Mama, I don’t LIKE this kind of oatmeal!” Which got me thinking, what’s so bad about rolled oats anyway? Aren’t they pretty healthy too? Shouldn’t I just be thankful my kid actually eats oatmeal? And so I went back to quick oats. But those darned steel cut oats – I wasn’t sure what to do with them. So I decided to bake with them.

I adapted a recipe from Rebar, one of my favourite cookbooks. I’m not sure if baking with steel cut oats is “accepted” but I found they gave the bars a very appealing texture – sort of as if I’d made the bars with chunky peanut butter instead. Sure, you could just go buy chunky peanut butter if you wanted that texture, but the goal here is using up those oats! If you are the kind of person who actually remember to soak oats, or never buys steel cut ones in the first place, you can also use regular oats, although the texture will be different. The original Rebar version also has a very yummy icing, but I left that off in order to make these into an every day “can go in P’s lunch” kind of treat.

You’ll need:
1/2 cup butter, softened
1/3 cup brown sugar
1/3 cup white sugar
1/3 cup peanut butter (preferably smooth!)
1 egg
1/2 tsp vanilla
3/4 cup steel cut oats
1 cup flour
1/2 tsp baking soda
1/4 tsp salt
Half a bag of chocolate chips

Soften the PB and butter and then mix with the sugars – I used a KitchenAid but any mixer will do. Add the egg and vanilla to the wet mixture too. In a separate bowl, combine the oats, flour, baking soda and salt. Once combined, add the dry mixture to the peanut butter mix and stir well. Throw in as many chocolate chips as you like. Spread mixture in an 8×8 buttered pan and cook at 350F for 25 minutes.

Mmmm. They were gone in a day.

Super Easy Tomato Sauce

Now that my return to work is imminent, I am starting to think about meal-planning.  I’ve so enjoyed having time to cook lots of meals while I’ve been on maternity leave.  While pregnant, I suffered from evening sickness for most of the pregnancy, so J did the lion’s share of the cooking.  But during the last eight months I’ve really gotten to “know” the kitchen again.  Last night I had a nice meal planned, but realised I’d forgotten to buy a key ingredient.  I happened to notice a tomato sauce recipe on Smitten Kitchen. The ingredient list was so simple that even I, in my grocery delinquency, had all ingredients on hand.  It’s a perfect weeknight recipe, when you’re also dashing out of the kitchen to fold laundry or tend to a snotty baby.

Time needed: 45 minutes

You need:
Spaghetti (or other pasta)
28-oz tin of whole plum tomatoes
5 tbsp of butter
one onion
parmesan cheese (optional, but recommended)
salt

Put the tin of tomatoes and butter in a pan.  Slice the onion in half and peel it, and throw it in.  Let the mixture simmer away, stirring occasonally to break up the tomatoes.  When you only have 15 or 20 minutes left, begin making the
pasta and grating the cheese.  Once the sauce has simmered for 45 minutes, remove the onion and serve the sauce over the pasta.
Sprinkle some cheese on top if desired.  Salt to taste.  That’s it!

I was skeptical, but even J, who loves his seasonings, really liked it and was astonished there was nothing else in it.

In my quest to eat something green or something orange every night, I also served it with some lightly steamed broccoli and carrots on the side.